Some of the practical stuff I have built
Over the years, I have built various nifty pieces of furniture. I have often been asked where I got the furniture from, or where I got the plans from.
Well, I built the furniture, and I never bothered to draw plans for it. Most of it I had designed in my head before I started building it, and the actual dimensions were often influenced by the dimensions of available lumber.
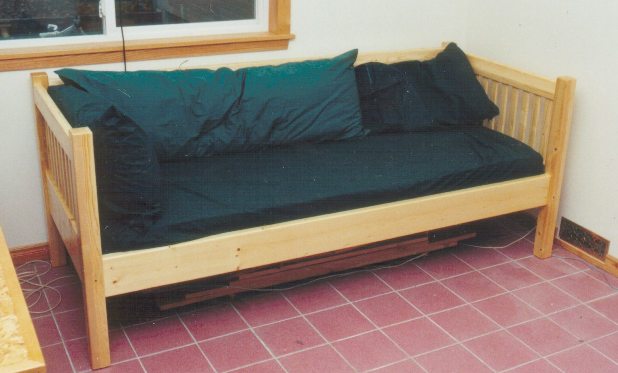
Daybed
Building it also gave me a good opportunity to extensively use my home made mortising machine. All the vertical slats are mortised in to the top and bottom rails. The head boards are also mortised to the posts, but the rails lengthwise are attached with bed hooks to the 'head boards', so the whole thing comes apart.
I used mostly spruce lumber from the home depot - the kind of lumber that is meant for framing. Whenever I go to the home depot, and I see some particularly clear 2x4's or other lumber, I buy it. I had enough clear lumber lying around that I didn't have to buy any lumber for building this one. All the vertical slats and supports under the mattress were also a great opportunity to use not so good and not so large pieces of wood I had lying around.
I have since written a more longer article about building this daybed.
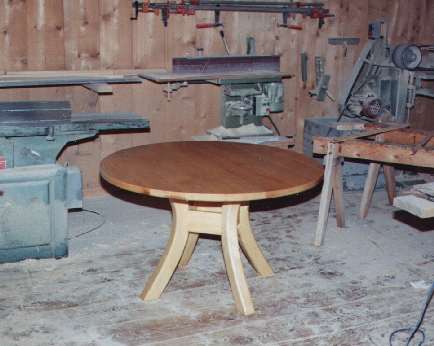
Dining table
The exact curved shape for the legs took some time coming up with. I freehand sketched the shape on scrap wood, cut out a template with the band saw, and then smoothed it with a belt sander. I used the template to visualize how the legs would look. I then used the template for marking the legs on a 3" thick pine plank.
The legs are fastened to each other with wooden cross pieces, which are mortised into the legs at a 45 degree angle.
My dad made the table top 1.5" thick out of solid birch. The birch was a bit knotty, so it has a very neat 3-d look to it from how the light plays off the grain that is not always paralell to the surface.
Because I couldn't fit the table in my car, it stayed in my dad's shop for a couple of months after it was built, and my dad keeps saying jokingly that he had to get it out of his workshop, because everybody wanted to buy it!
I have since written a longer article about building this dining table.

Wooden camera tripod
The tripod pictured here is actually the second one I built. The first one was more solid, but heavier, and the legs only had two segments. The tripod pictured here has three segments to the legs, with some very complicated dovetail joints to hold them together and let them slide. When fully extended, the sections of the legs overlap only 10 cm (the photo shows them only slightly extended). There is a nasty little spring loaded block inside the legs that catches them before they slide all the way out, although if anybody else was using the tripod, that mechanism would probably soon break.
The legs are locked by clamping the outside parts of the dovetail together with a wing nut. When not in use, I tie a shoelace around the legs, and lug it around by the drawer handle on on of the legs.
I have since written a longer article about building wooden tripods.

The disassemble-able desk I built for University

The disassemble-able desk, disassembled
The biggest component of the desk, when disassembled, is the desk top. Even the thing that holds the drawers comes apart. The drawer handles are just holes in the front panels, so they won't get caught or banged when loading or unloading them from a vehicle.
The desk has multiple configurations. By reversing the 'rungs' that support the desk top, the drawers can be mounted on the left or right, or not at all. Also, the back 15 cm of the desk can be removed, so the depth can be varied slightly depending on where it set up and used. When used with a computer, the extra depth really helps.
After I was done with school, My sister Marlene used it for a few years while attending university. Right now, I am sitting at this as I am typing this.
I have since written a longer article about this student desk.
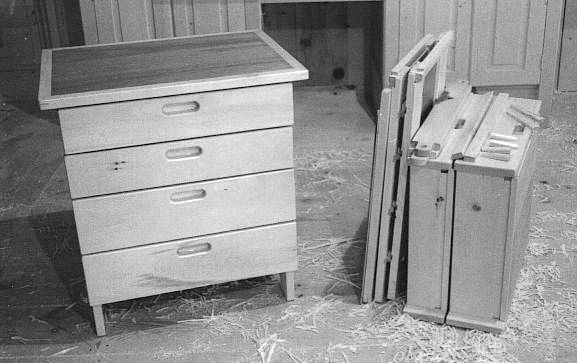
This is a dresser I built for easy moving
The drawers themselves cannot be disassembled, but two drawers can be inserted 'into each other'. The drawers are basically facing each other, and notches in opposite corners of the drawers permit them to slide together, with each drawer having two sides 'outside' and two sides 'inside'. The Disassembled dresser on the right has the drawers slid into each other (what looks like two drawers is actually four)
This feature turned out to be somewhat redundant, however, as it was always more convenient to just leave the drawers filled with whatever they had in them when moving, so there was no way to insert them into each other.
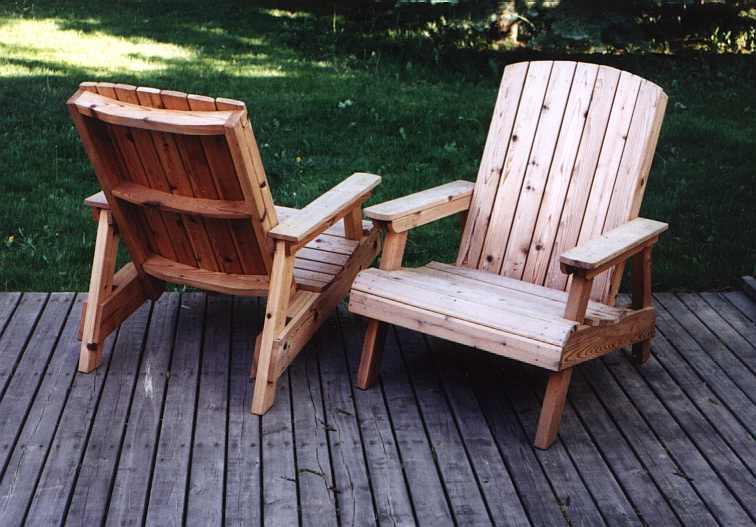
Some extremely solid cedar deck chairs
To my Woodworking website